
A Form Node enables the assistant to collect data, such as names, emails, messages, and other key details that can be stored, emailed, or sent to external applications.
Purpose of the Form Node
The Form Node transforms your Ai chat assistant into an interactive data collection tool.
It is commonly used in:
Sales and lead generation (collecting contact info).
Customer service (gathering issue descriptions).
Education or internship portals (capturing student details).
Surveys and feedback forms.

On the top-right corner, click “Add a node”, then choose Form node from three options.
Select the position from the existing node which you want to add it to.

A form node is successfully added automatically named “Form node 2”.
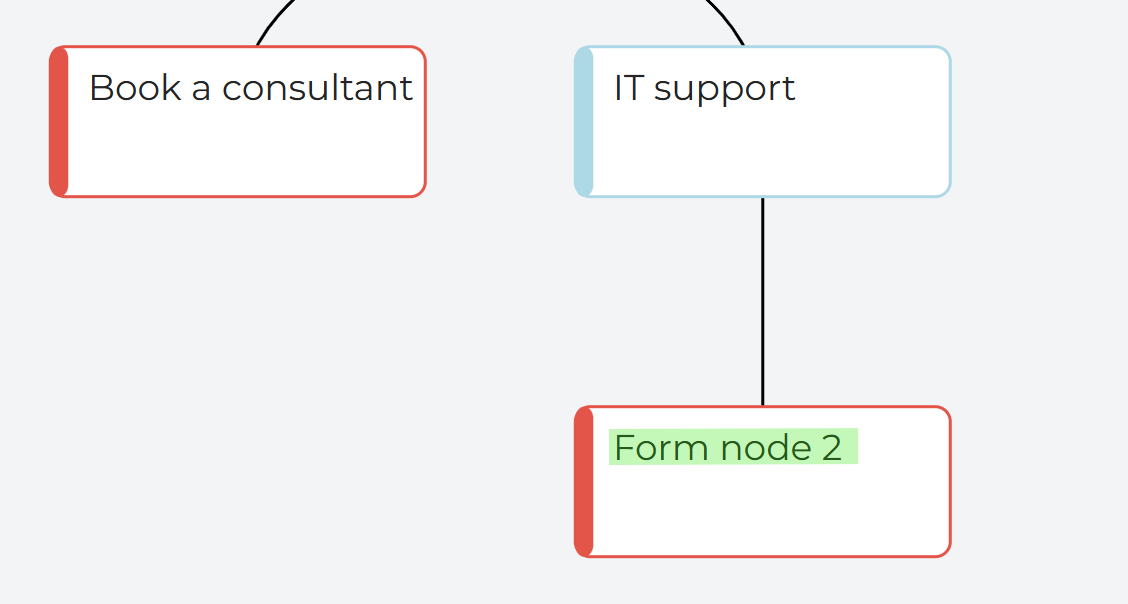
Edit a form node
Click on the new form node to edit information.
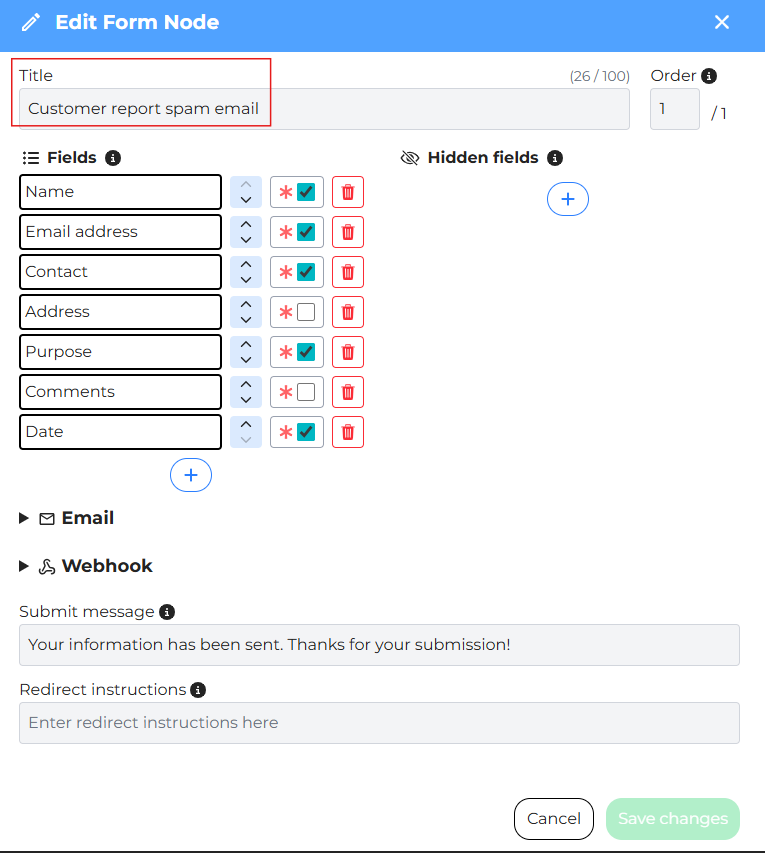
Enter a clear title (e.g., “Customer report spam email”).
Add as many fields as wanted to capture information (name, phone number, email,…).
Mark required fields.
For example, Name and Email must be mandatory for lead follow-up.
Add a Hidden Field (Optional):
Hidden fields can be added to the form to store metadata that users do not see. This information is submitted along with the form data and can be useful for tracking, routing, or automation purposes.
Key: type
Value: sales or support
Hidden fields help categorize submissions automatically.
Delete a field by clicking on the red bin icon if no longer needed
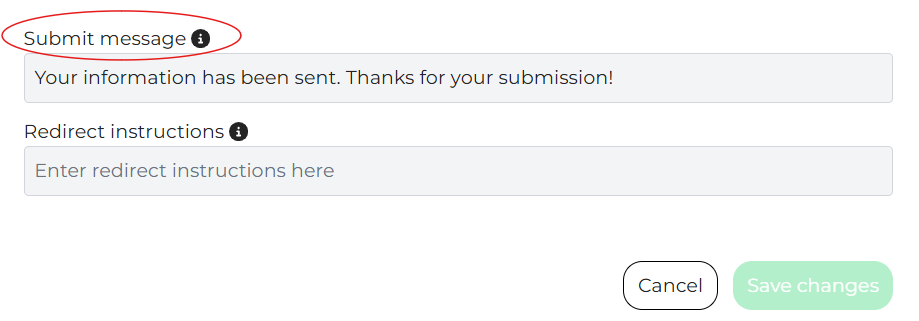
Adding a Submission Message
Once the user completes the form, you can customize what they see next:
“Your information has been sent. Thanks for your submission!”
This message confirms that their input has been recorded successfully.
Actions After Submission
DepthNode provides two ways to handle data collected after a form is submitted.
1.Email notification
Email notification sends form submission details directly to a specified email address.
When a user completes and submits a form:
- An email is sent to the configured recipient containing the submitted information.
- A confirmation message appears in the chat to inform the user that the submission was successful.
How to set up Email notification
Open the existing Form Node.
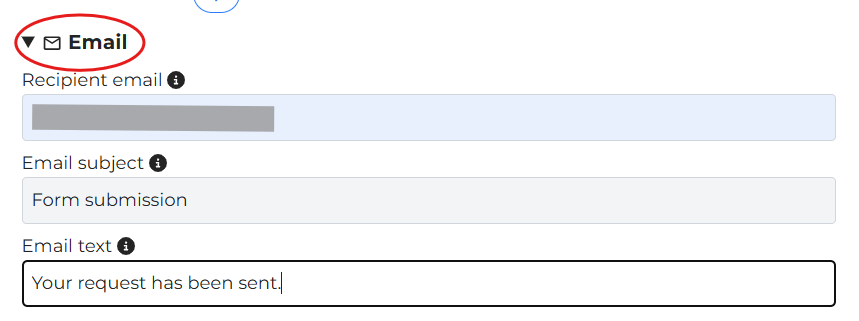
Under Email, enter:
- Recipient email address
- Email subject
- Email message content
Save the form configuration.
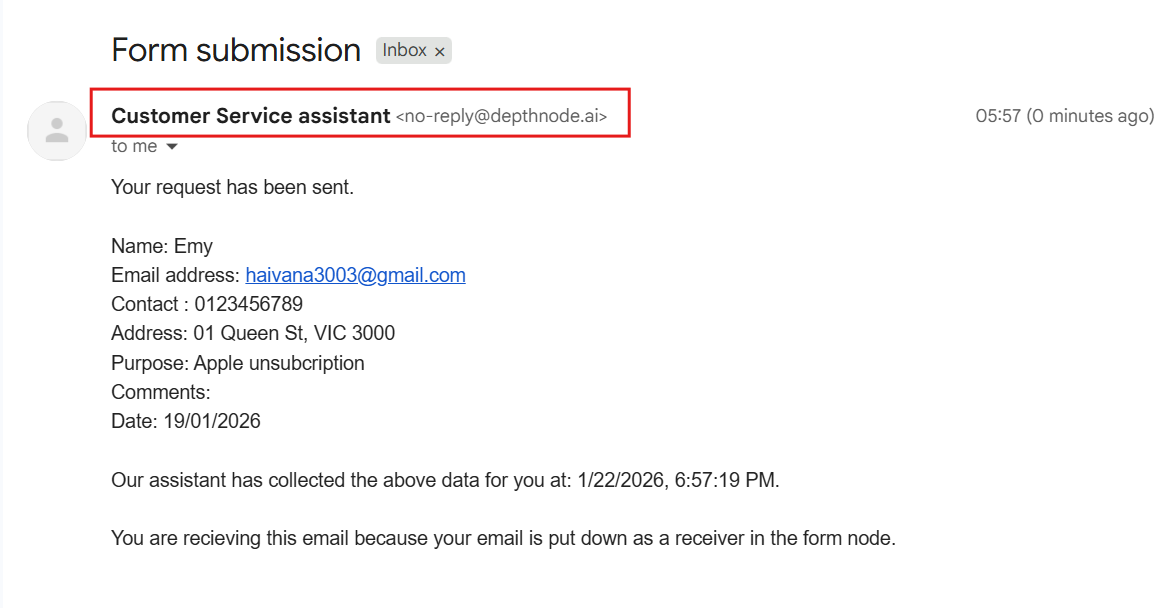
During the chat, once the user completes and submits the form, user will receive both an in-chat message and a confirmation email from DepthNode.

An email will be sent when the form has been successfully submitted.
2. Webhook Integration:
Webhook integration sends form data to external platforms through a webhook URL for further processing and automation.
This allows form submissions to trigger workflows in tools such as n8n, Make.com, Zapier, CRM systems, or spreadsheets (e.g., Google Sheets).
After a form is successfully submitted, the user will always see a confirmation message in the chat, ensuring they know their information has been received.
