Purpose
A Jump Node allows you to redirect users from one part of the decision tree to another existing node.
It is especially useful when you want multiple paths (such as Sales, Technical Support, or Customer Service) to reuse the same node, like a shared form or introduction, without duplicating content.
Jump Nodes help keep large decision trees organised, consistent, and easier to maintain.
How to Add a Jump Node
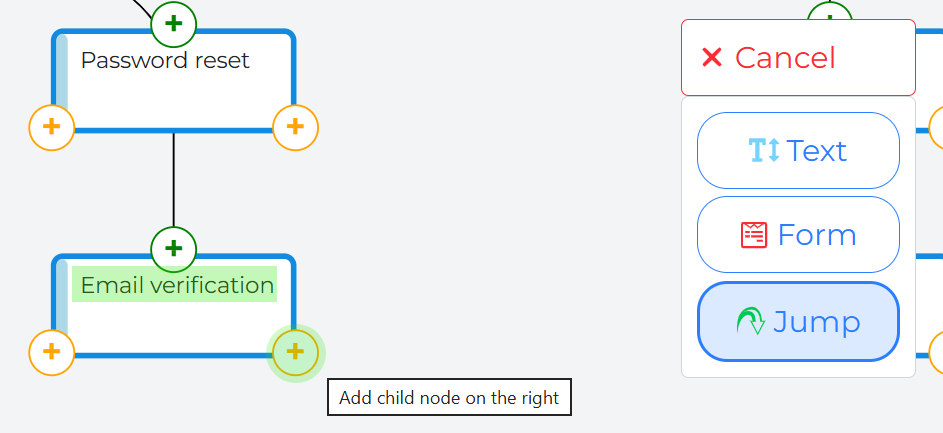
Click on the icon “+Add node” on the right corner, then choose Jump node from the list.

Select the position from an existing node which you want to add a new node.
For example, add a new jump node to the right of “Email verification”.
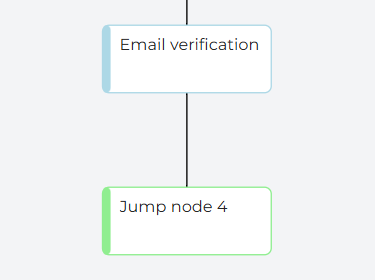
The system automatically assigns a node number (for example, “Jump node 4”) to help you identify and navigate nodes more easily.
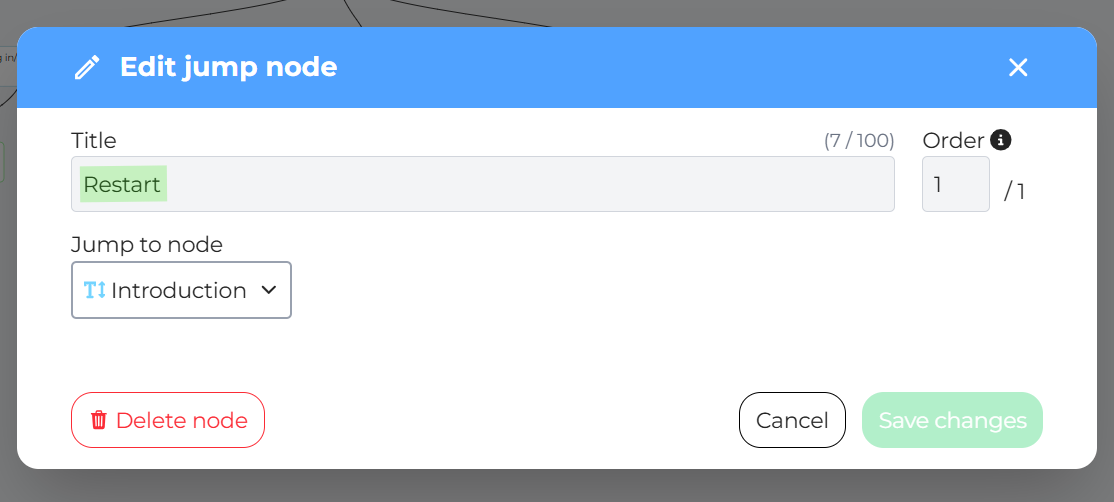
Enter a clear title of jump Node 4, “Restart”.
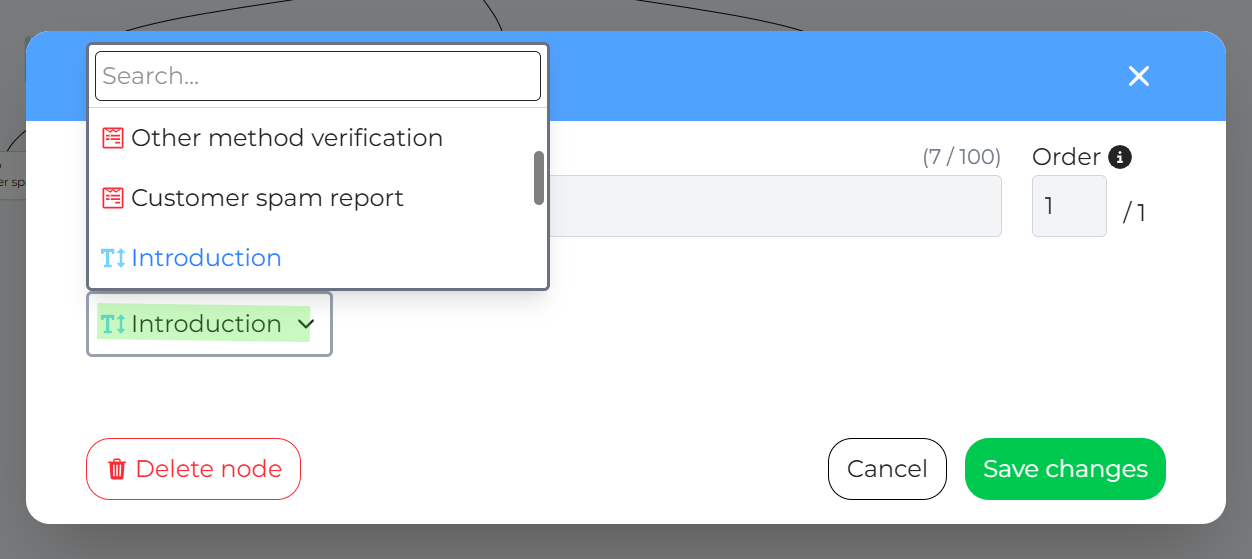
Jump to node:
Select the destination node in the Jump to node field.
The jump node will redirect users to the selected node when triggered.
For example, set “Restart” to “Introduction”.
Click Save changes to apply the configuration.
Key Guidelines
Do not jump to another jump node to prevent infinite loops.
Keep all the same jump node connections within the same assistant.
Note that changes to the target node automatically update all the connect jump node.
Jump node hovering
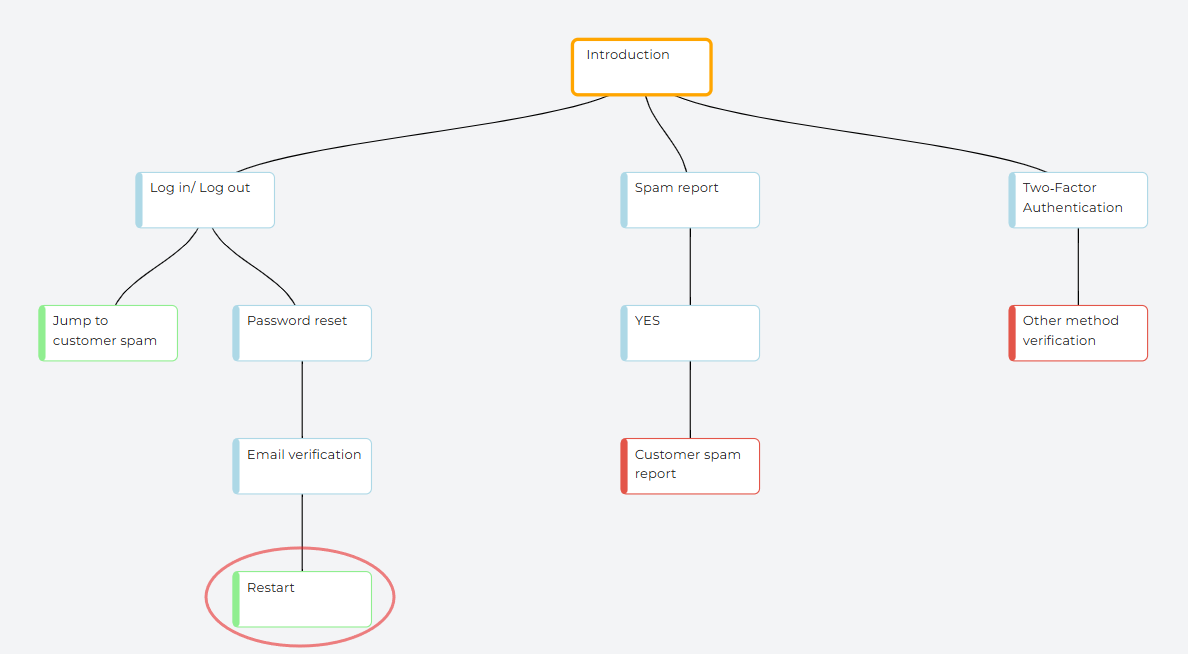
Hover over a jump node. The target node becomes highlighted in orange.
See the example in the image below.
Test How the Jump Node Works in the Chat
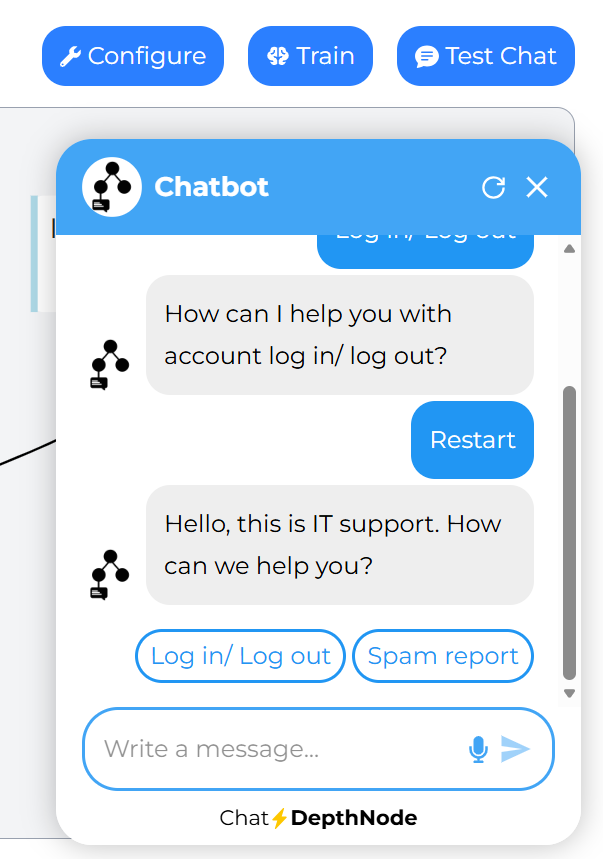
Click Test Chat to preview the assistant flow.
Navigate through the conversation until you reach the node that contains the jump node.
Select the jump node option.
Confirm that the chat instantly redirects to the target node (for example, directly opening a form or restarting the conversation at the Introduction).
This allows you to verify that users are taken to the correct point in the decision tree.
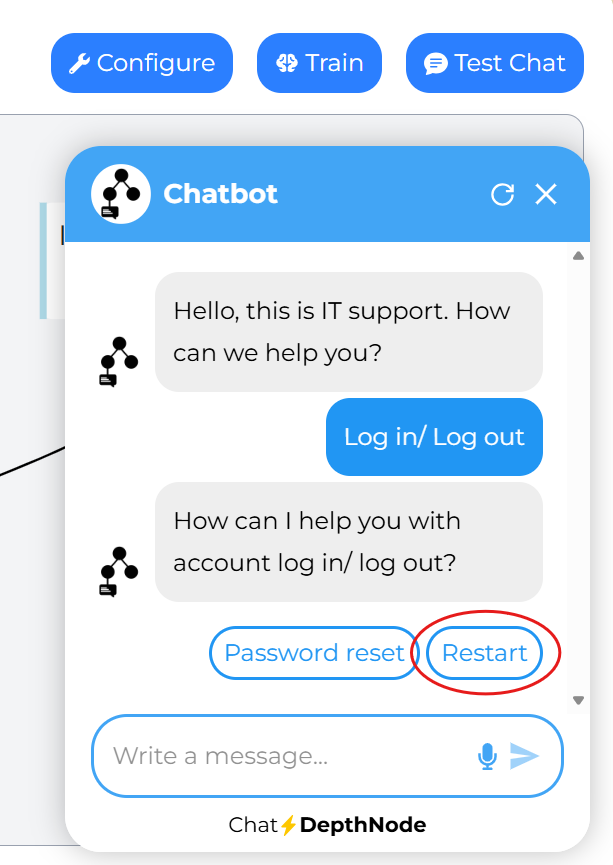
Click on “Restart”, the chat restart from the “Introduction”.